Guest Room Revamp
After getting the keys, we focused most of our attention on the main living space, so we decided it was time to work on our guest room revamp, which was the most logical bedroom to start with for a couple reasons. First, we had a guest coming the following weekend to help us on a different project (more on that soon), so we wanted to have a place for him to stay. Also, we felt this would be a good opportunity to get one room completely done, including floors, to learn each task a little better.
Here’s how the first weekend on our guest room revamp looked:
Friday Night
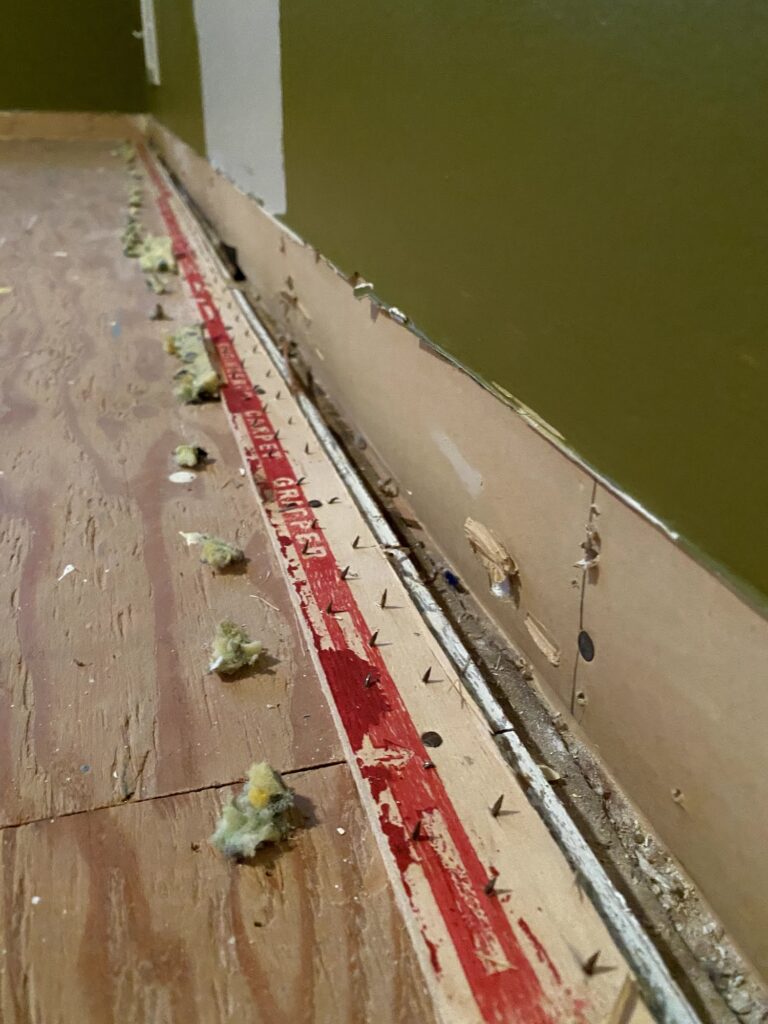
We spent Friday night after work getting the room ready to paint. To try to avoid scratching the walls, we decided it would be best to take the carpet out first. Taking the wall base out allows you to pull the carpet out without much trouble, so we took the base out before anything. We can talk about this later, but we knew we were going to replace the wall base because it is much easier to do the floors this way, so we weren’t worried about saving any of the pieces we took off.

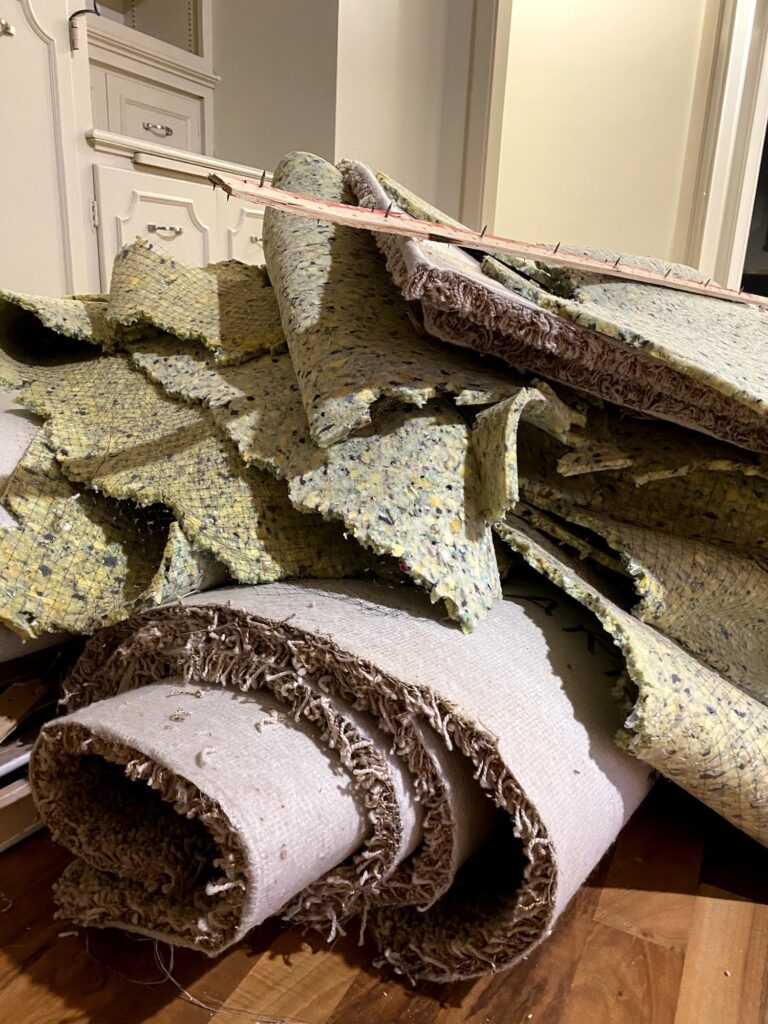
Next, we put on thick gloves (this is important – Tack strip is no joke!) grabbed a corner of the carpet and pulled hard. Once we got it loose on three sides, we cut it in about 3-4 foot strips to make it easier to carry out of the room – carpet is heavy. We used a box cutter to do this which was quite a workout, but I am told there is a saw blade that can do that if you don’t want to do it manually.
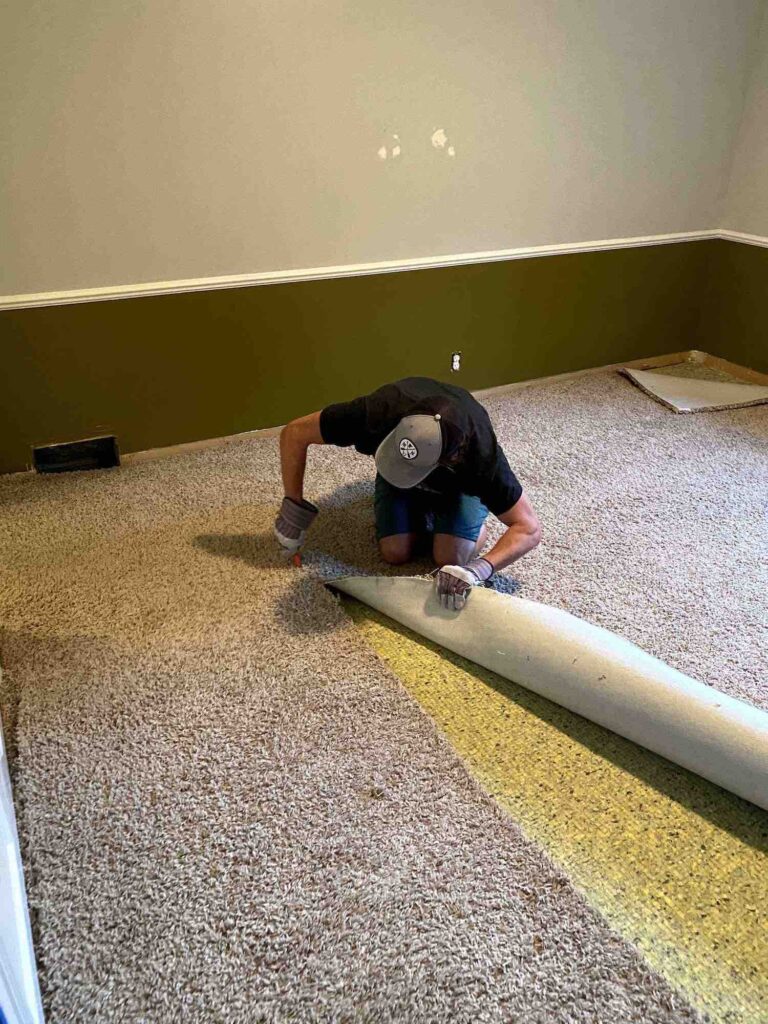
Once all the carpet was out, we started to remove the carpet pad, which is much less strenuous (but MUCH messier). It is much lighter, so you don’t have to worry about cutting it into smaller pieces, you can just carry whatever you rip out pretty easily.
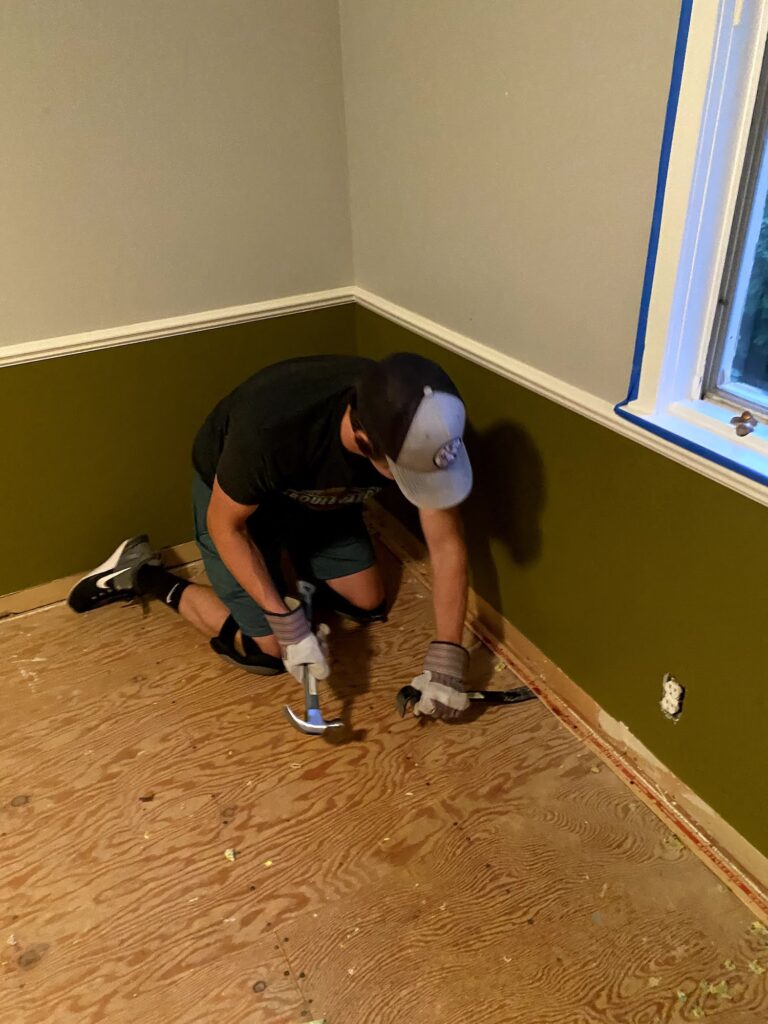
Next, we made sure to get the tack strips out – again, these HURT if you barely touch them on accident and we didn’t want any painting injuries. To do this, we used our wonder bar and a hammer to get under the nails and took each section out.
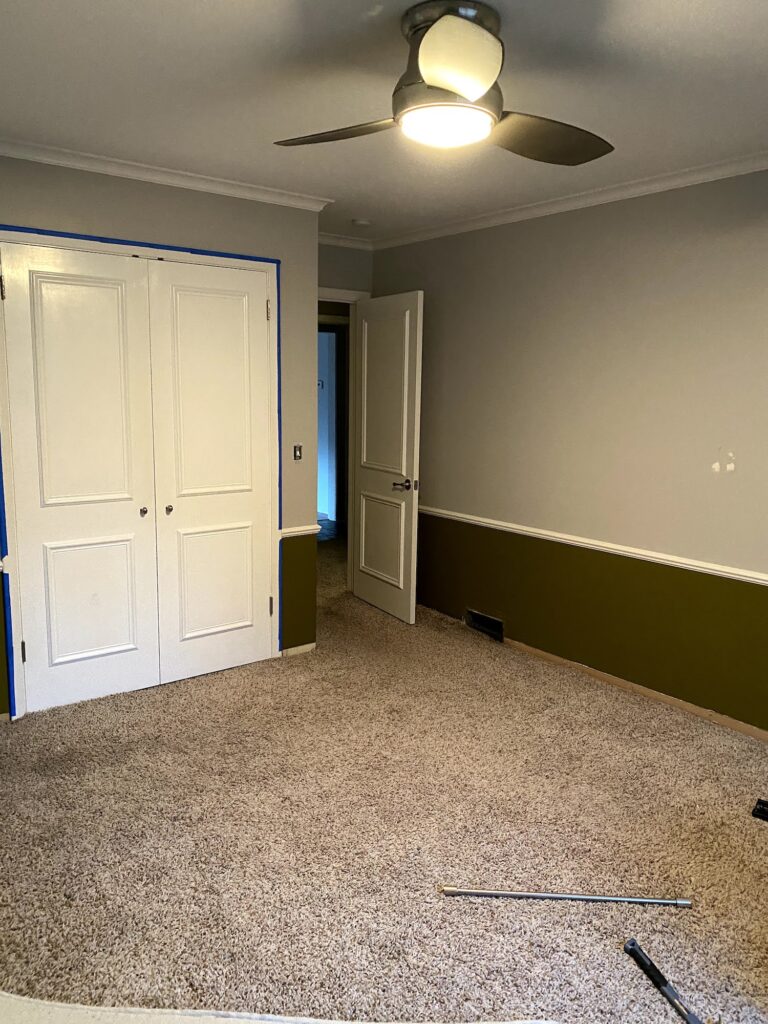
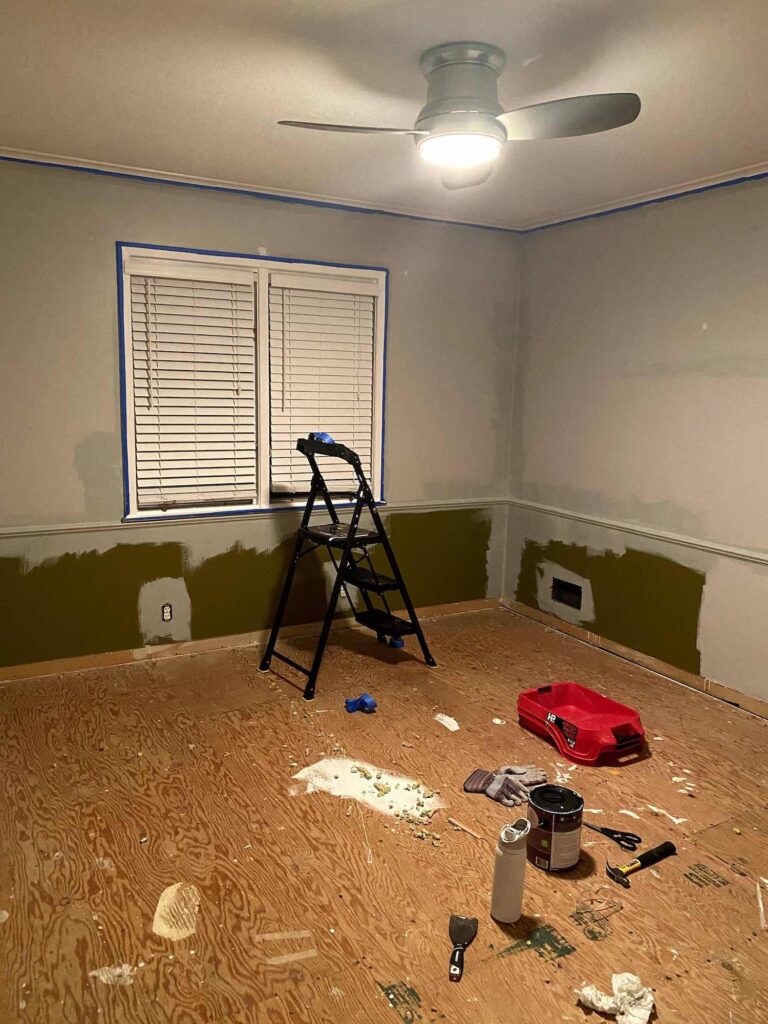
Now that the floors were taken care of, we turned our attention to the walls. We had a couple holes to patch from curtain rods and a tv bracket we took down so we did that first to account for drying time of the putty. As the putty was drying, we started taping around the crown molding, windows, and door frames. We took off outlet, light switch and vent covers and carefully taped what was left to protect them from paint. We didn’t tape around the chair rail because we decided that we would paint it the same color as the wall- this way, it would give the room a little texture, but wouldn’t visually break up the wall like it would if it was a contrasting color, making the room feel taller I think.
Finally, we were ready to start focusing on paint (I was chomping at the bit to get started after all the indecision… remember this room covered in paint color options?!)

To start we “cut in,” meaning we used a paint brush to paint around the places that we taped, since a roller would have a tough time getting to those places. In addition to the taped areas, we painted the corners using our brush for the same reason. While Matt got the ceiling spots without needing a ladder (insert eyeroll/side eye/jealous emoji here) I used my paint brush to paint the first coat of the chair rail. Because of all the nooks and crannies in the detail of the chair rail, it really had to be painted with a brush to get full coverage. Once our first coat was on, we decided to call it a night and start fresh in the morning.
Saturday
Now we were ready to start painting with the rollers! We were so excited to see how the color we picked looked in a full room so we jumped right in. Lucky for us, Matt’s mom and sister, Lilly, were willing to come help and this made the painting go SO fast!

In fact, it went so fast that Lilly was able to sneak away to paint the vanity in the bathroom connected to this bedroom! We used the same color as we did for the walls in the bedroom (I know, not very original, although I feel like it looks much more blue in this application!) This fresh coat of paint made a HUGE difference in making this bathroom feel fresh and clean which was the biggest goal in there.
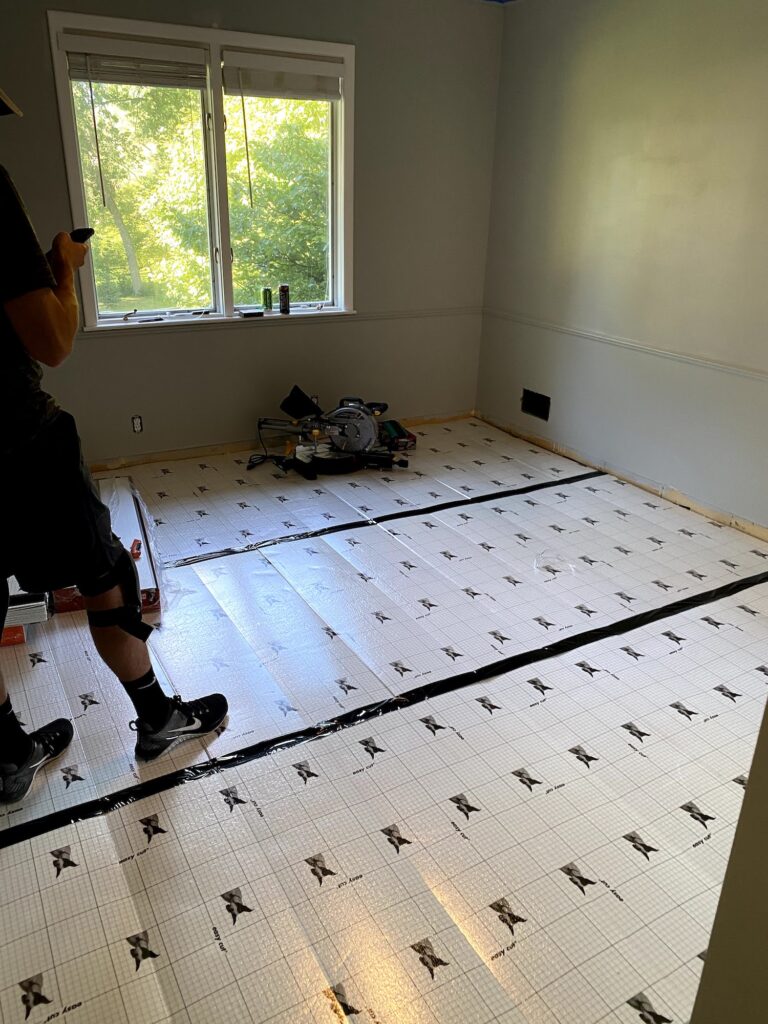
The new floors have been on my mind for weeks, so I was insistent that we at least lay the underlayment before we headed out (can you tell that I’m the impatient one?). I won’t bore you with the details of that process here, but feel I’m planning to talk about the nitty gritty in a future floor prep post.
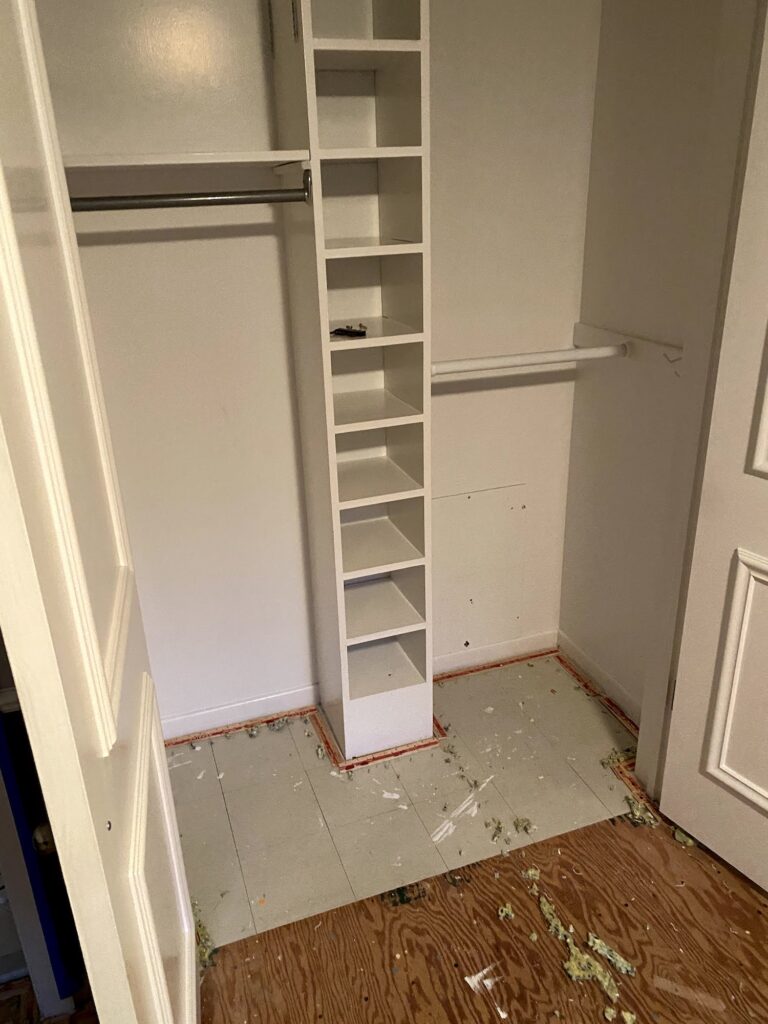
There were some loose ends to tie up like removing tape and adding fresh paint and new pulls to the bathroom cabinets. We tackled these between other tasks over the next week. Ultimately, we were so excited to see some progress and we couldn’t wait to get the floors ready to host our guests, but had a little hiccup before we could get to floors. As we were pulling up the carpet in the closet, we noticed some vinyl tile that made me nervous about possible asbestos. Our house is in the right time period, and given my personal connection to asbestos exposure, I wasn’t going to take a chance. It had already been disturbed, so I put on gloves and a mask, and put a sample of it in an airtight plastic bag to take to get tested. Then we closed the doors to the closet and waited for the results to go any further on the flooring in that area.
Regardless of our roadblock, we were very happy with the progress and were ready to tackle the flooring as soon as we could, with fingers and toes crossed for negative asbestos results. I won’t make you wait like we had to– the test was negative and we were ready to move on to floors (which is next week’s story!)
Check out the before and during shots below! What do you think of the color we chose?